This is a really nice composition by Charlotte Janse van Vuuren – very peaceful. I loved it immediately. The rule of thirds is working well with the placement of objects and the highlights, shadows, and textures give a pleasant visual journey. I like how the simple round shapes contrast with the more complex pattern of the crochet work. She has other nice work on her site, but this is my favorite.
Hank Porter – beautiful winter scene
This is a super nice piece by Hank Porter. The design and rendering are both fabulous. In addition to the scratches there is a lot of pen work, so I assume it was done on a white board with ink applied by pen and brush, which was then selectively scraped away.
To view the details, right-click on the image and choose something like “View image in new tab”. It’s a big image.
Brian Gallagher – nice old buildings
Brain Gallagher has some nice work on his site. The ones I like best are the landscapes with buildings. I think he really has a gift for buildings. These two are especially charming. The second one is probably my favorite.
Stefan Hänni – Kugelfisch
Dietrich Moravec – Der Skeptiker
Dirk Shearer – scratchboard images for Mice Templar
Francis Sweet – Five of a Kind
Looking through the website of Francis Sweet I am struck by the volume of work he has done, and the large sizes. I particularly like the composition and division of space in this one. The dark rocks and the dark beaks of the ptarmigans work well against the lighter shades of gray. The peaceful feel of it makes me relax.
This web image is tiny in comparison to the original size of 24″x18″. It would be interesting to see the texture up close.
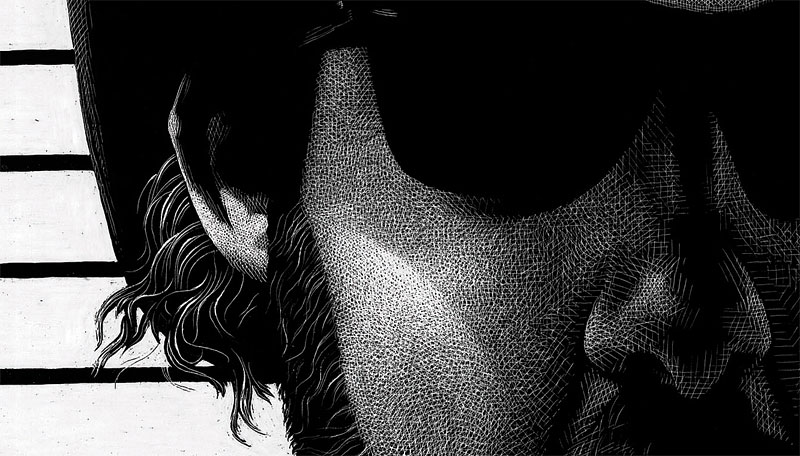
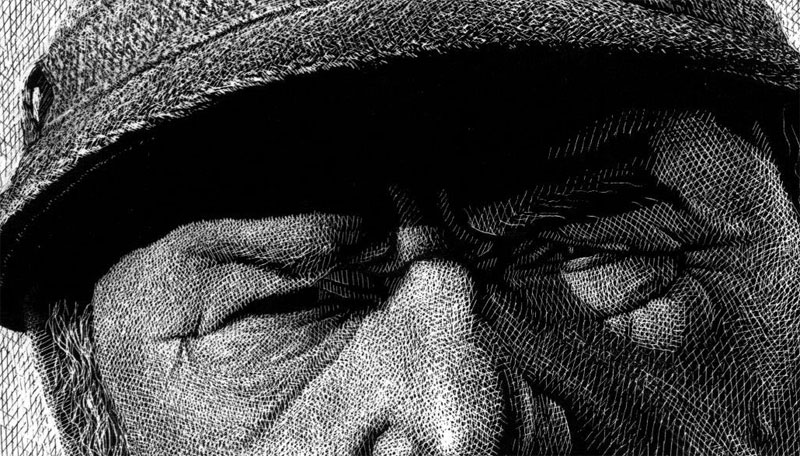
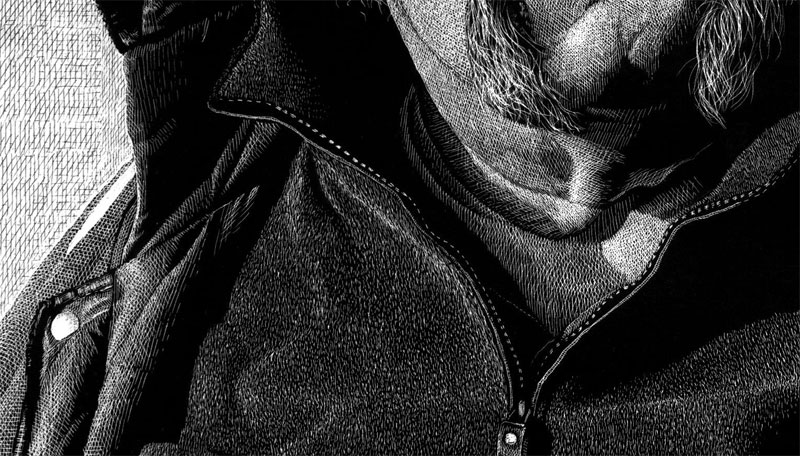
Steve Carroll – scraperboard portrait tips and closeups – Nice!
I asked Steve Carroll if he would let me show some of his images on the site, and if he wouldn’t mind giving some additional information about his process. He far exceeded my expectations. The images are beautiful and large enough to see the hatching patterns he uses. I had been interested in seeing them up close, and today I got my chance. I am also grateful to learn more about his techniques. Thanks, Steve, for being so willing to share.
Steve also has a Facebook page
Here is Steve explaining the process in his own words:
First of all, I draw a preparatory sketch of my subject on to thin ‘layout’ out paper which 80 grams per square metre (English spelling!). Once I am satisfied with the drawing, I turn over the paper and cover this side with white conte crayon or chalk. Then I tape down the paper on to the scraperboard drawing side up and using a hard pencil (4H) I draw over the original sketch design with moderate pressure. Once all the main reference lines are transferred on to the board I lift off the paper and with a soft brush take away any loose chalk dust.
Now I have my white lines as a guide, I can start scratching/scraping to my hearts content. I keep minimal contact with my fingers, so I place a sheet of paper under my drawing hand – this prevents smudging the white guide lines. When I am happy that no more scratching is needed I use a slightly damp cloth or paper towel to wipe away the chalk lines and there you will have a smart looking image to be proud of!
I use ‘Essdee’ British Scraperboard. And to cut the black ink away I use ‘scraper cutters’ as seen in the photo. I use the index pen nib to correct the ‘rare’ mistake! by adding Indian ink back on to the surface. (don’t tell anyone this!) As well as these tools, I also have a smooth oil stone to sharpen the cutters as inevitably the blades can become blunt which affects the quality and consistency of the line.
The textures are created by using the crosshatching method and also using a stippling effect.
The latter technique is far more time consuming but rewarding if used in the correct context (see Andrew Townsley’s fleece jacket). On the odd occasion I scrape large areas off altogether and draw and/or dab ink back onto the board, and scrape this again creating a rich and complex texture.These are just some of many approaches you can try. This medium is only limited by your imagination. So what are you waiting for – get down to your local art store and buy the relevant materials and scrape/scratch away. Don’t worry about making mistakes, remember the index pen nib! And besides, making mistakes is good for you, it’s the best way to learning and improving your techniques.
Russ McMullin – Candy – pet portrait
I did this pet portrait a few years ago for an artist friend of mine in Australia. It was done on an 8×10 Ampersand board with a #11 Xacto blade. For some reason I thought this one would be a lot easier than it was. Keeping track of all those strands of hair was a challenge. In comparison, the nose and tongue were a piece of cake. Even with the challenge it was fun to do.
A few more by Lori Dunn – beautiful canine skull
This piece is called “Canine Ancestory”. Any time you mix scratchboard and a skull, there is a good chance of something cool happening. This skull is seriously cool. If you right click and “view image” it will open in its own window much larger. I really like how the scratches turn the form on the cheek bone, or zygomatic arch, or whatever that bridge of bone is called.
This little penguin is taking “Baby Steps” – sort of sad and cute at the same time.


